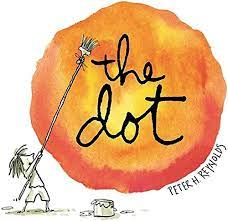
The first project for the Kindergarten classes this year is The Dot. There is a book that you will read to the class to introduce them to the story of The Dot and then you will move on to the art project.
Supplies:
White paper with dot stickers in the middle of the page
Messy mats (large black paper)
Small, medium and large paintbrushes
Dog bowls with sponge
Acrylic paints
White paint trays
This is what our finish products will look like:
To prepare for this project, please place the dot stickers on the white paper for the students. Either before they arrive to the art room or while one of the other parent volunteers is reading The Dot book.
You will also need to connect one of the parent volunteers' iPhone to the tv in the classroom in order to play videos and show pictures to help them understand the project. Here are some instructions on how to pair an iPhone to the tv. First use the bigger LG remote (the remotes are hanging on the left hand side of the back of the tv with velcro). Next use the Apple TV remote and press the menu button. Next go to the screen mirroring setting on the iPhone. Click screen mirroring and select SKY 189 (that is the room number for the art room). A passcode will appear on the tv screen to enter on the iPhone. From there anything on the iPhone will show up on the tv. You can pull up this blog and play the videos directly from the iPhone. (These instructions are posted near the tv for your reference as well.).
The red circle indicates screen mirroring on iPhone. Ok now you are ready to show videos and begin the project!
Before you get the students started on painting.. let's cover a few basic painting tips with them to help them understand how to take care of the paintbrushes! This might be the first time these students are using a paintbrush. :)
Here is a great video of art teacher Cassie Stephens instructing her kindergarten class on how to do this project. You can skip to minute 2:15.
A few takeaways:
1. Talk about the parts of the paintbrush- handle & brush. Remind students to not touch the metal part or the brush head. This will help their hands stay clean (er)!
2. Explain to them to use soft strokes with their paintbrush. You can compare it to a ballet dancer on her tippy toes! Ballet dancers don't stomp around and squish their paintbrush bristles ;)
3. Instruct them to only get paint on the brush part of their paintbrush.
4. Explain the concept of concentric circles.. we want the circles to hug each other.
Read The Dot book to the class. Next, have them write their name on the middle of their paper on the back (the side without the sticker). Then have them turn their paper over to get started!
Next they will use any colors they want to create their Dot painting! Explain to them that they will start by painting a circle right around the sticker on the paper. They can rotate their paper if they need to, to help make the painting easier. Try to paint the circle as close to the sticker as they can! Rinse the paintbrush out in the water and then make an X on the sponge to dry off the paintbrush (mostly to avoid their paper being soaked with water). Then select a different color to paint another circle very close to the circle they just painted. Rinse the paintbrush, draw and X on the sponge and continue the process of painting circles.
The students can do a pattern of colors if they want, or a rainbow, or just random colors! Encourage them to be creative!


