Supplies needed:
Pre cut to size mixed media paper
Strips of blue, light blue, and pink tissue paper for pond background
Larger pieces of pink, green, yellow tissue paper for water lilies
Small cup of glue/water mix
Paint brush
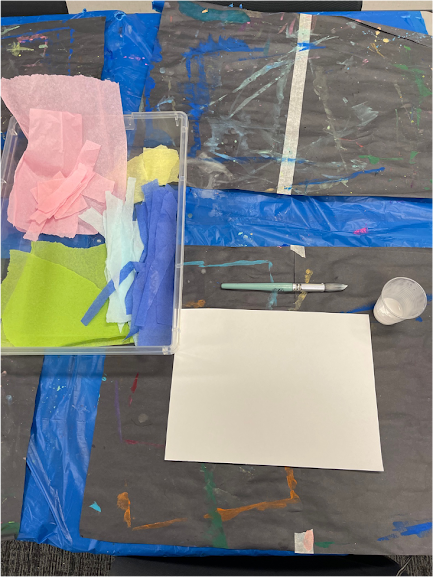
Each table will have a pre-assembled tray of the tissue paper that will be used for the project for the kids to share- there will be a back stock of tissue paper for replenishing if needed!
Set up will look like this:
A little background:
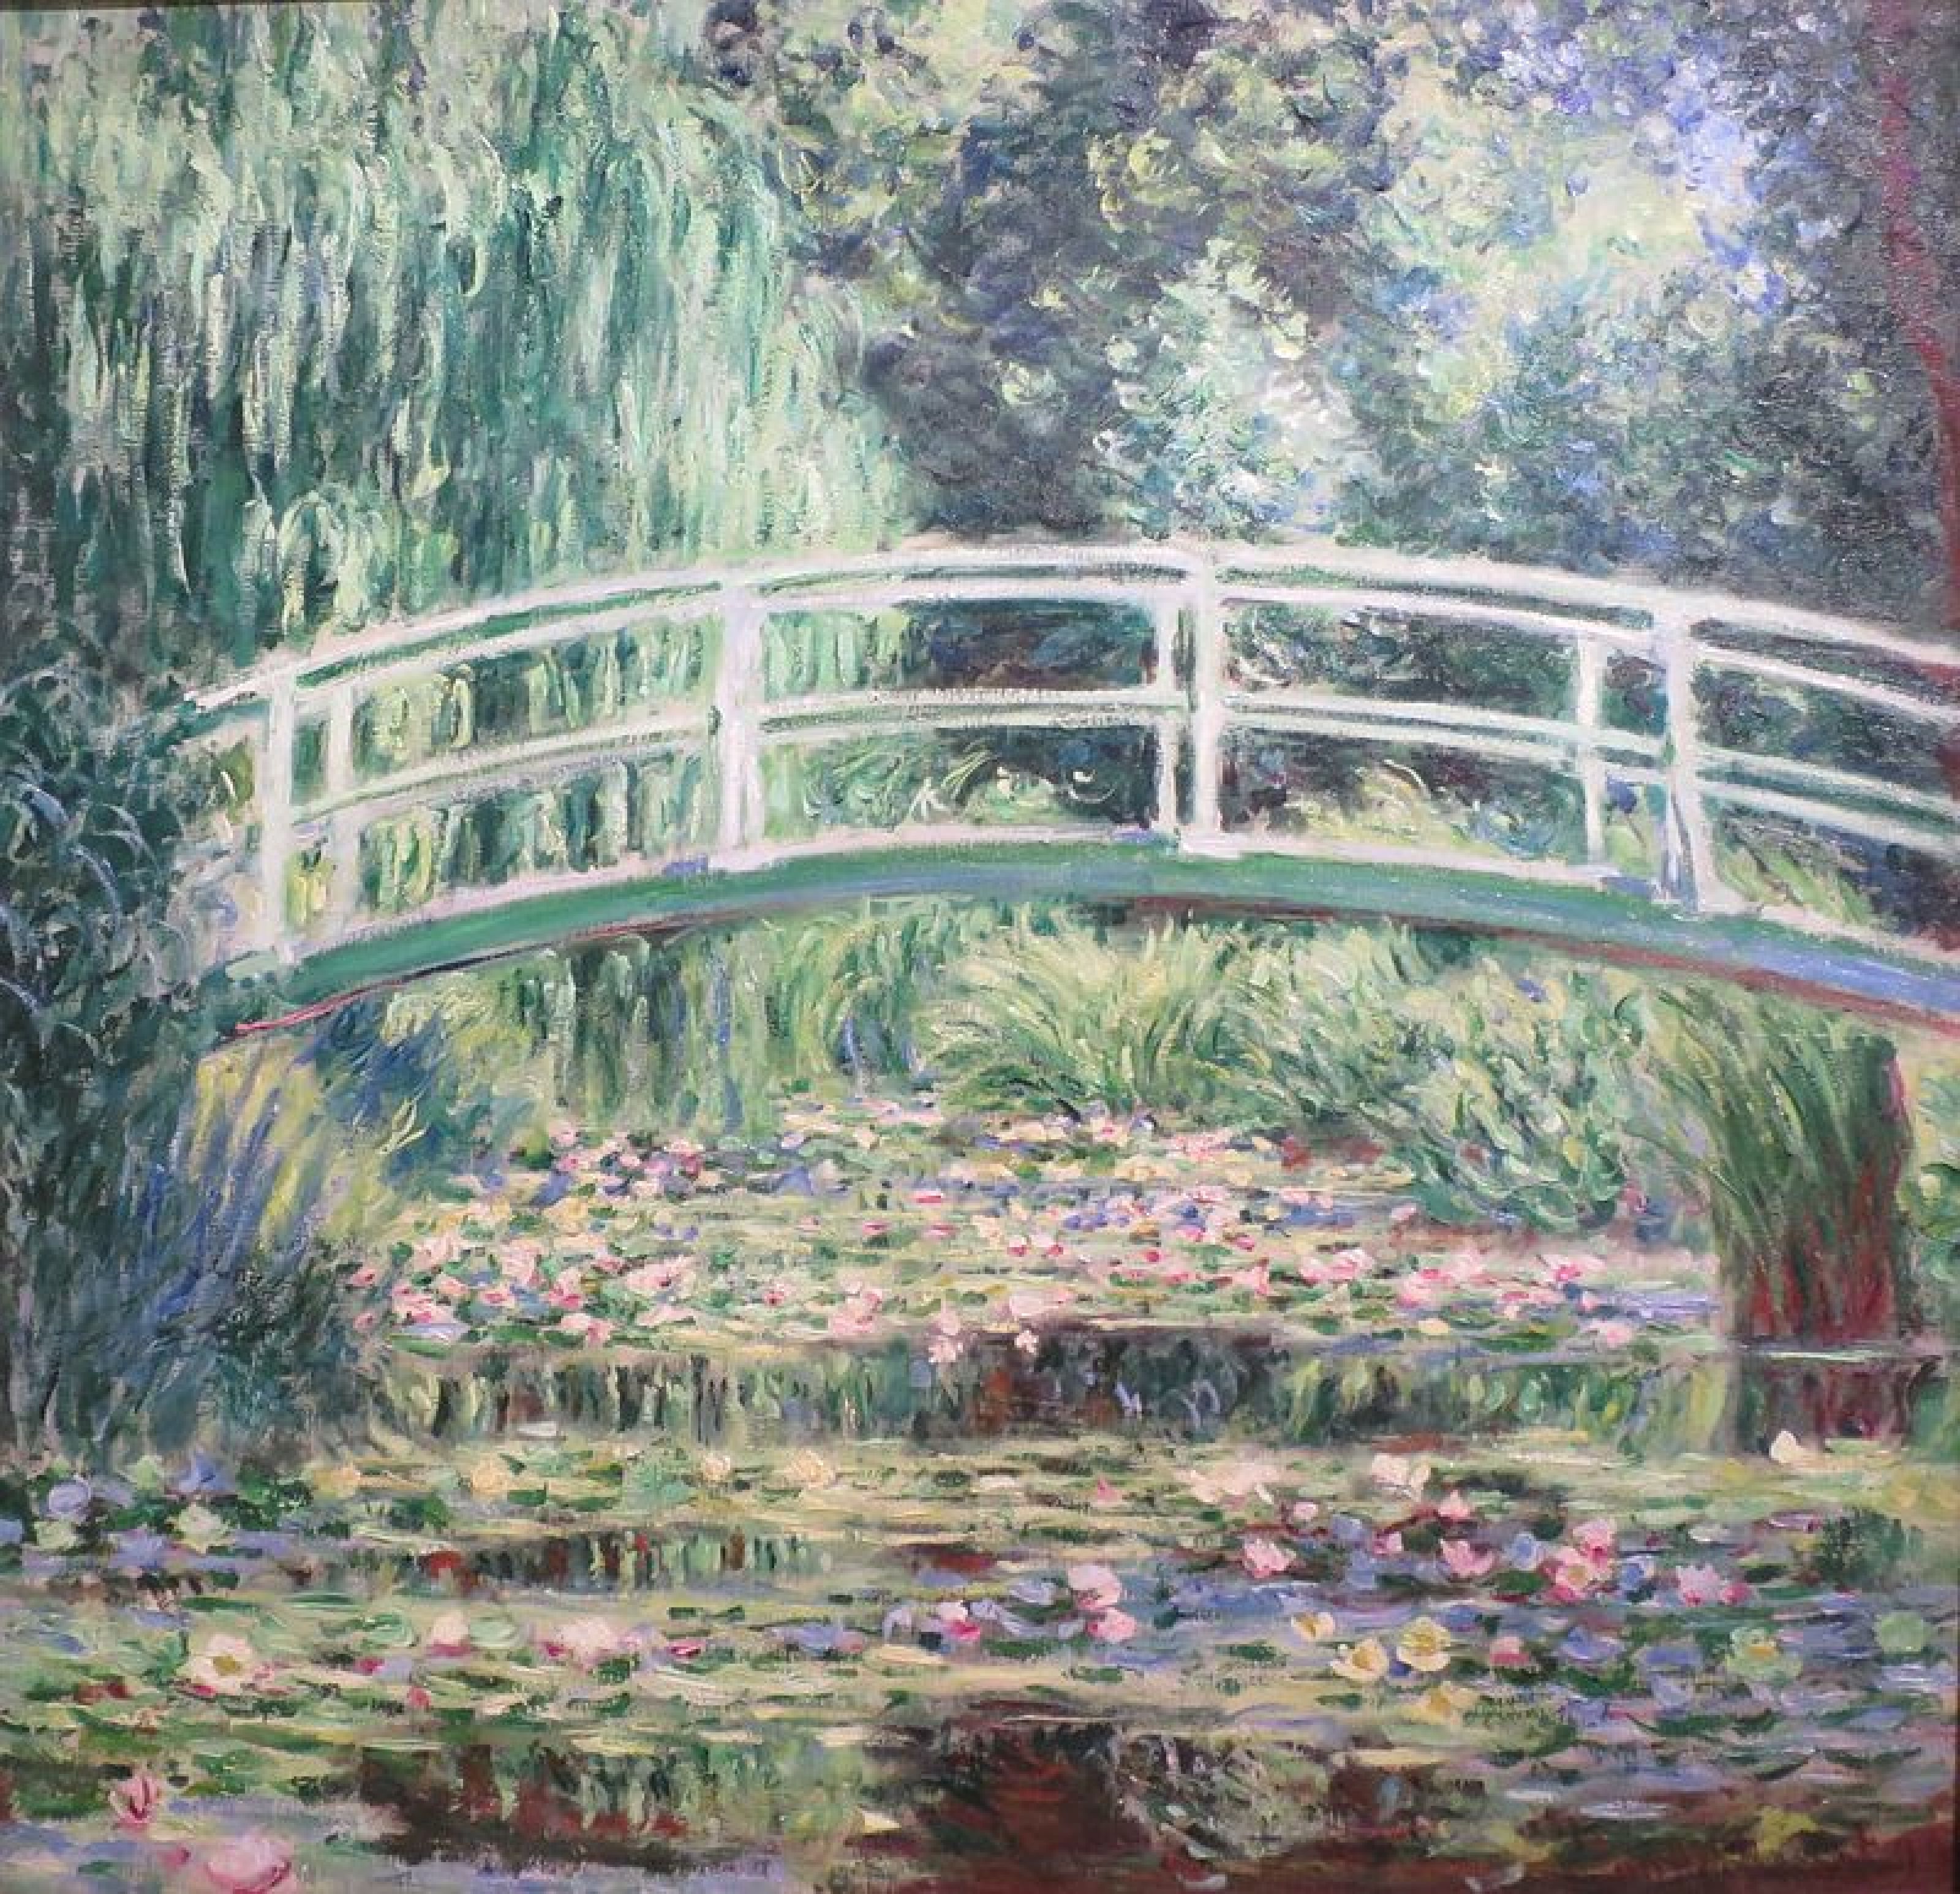
This simple Monet art project is a lot of fun to make and really helps capture this famous impressionist artwork style. He was worried less about how things looked exactly, and more about the basic feel – the impression the scene left on the viewer. He did several different scenes, but he particularly enjoyed painting his pond filled with lilies. In fact, Claud Monet painted 250 water lily paintings! This water lily art project perfectly captures this famous French artist in a memorable way! Here are some examples:

So first you are going to make sure your paper is in landscape position for a nice big pond! We are going to work in sections from top of the page to the bottom. Remember we are working quickly and are worried less about how things looked exactly, and more about the basic feel!
Let’s start with our pond- we need some water!
We are going to take our paint brush and dip it into our glue solution then paint a line across the TOP of our paper.
Then taking our blue strips of tissue paper you are going to place it onto the glue. From here while your glue is still wet, we will add more blue strips to complete our first section.
We will repeat the process of painting a glue stripe all the way across the page right below our first layer of tissue paper. Now adding more blue or even a pop of light blue or pink for some highlights and movement in your pond. It is ok to overlap your pieces some just try not to layer directly on top of each other.
Yours should start to look something like this:
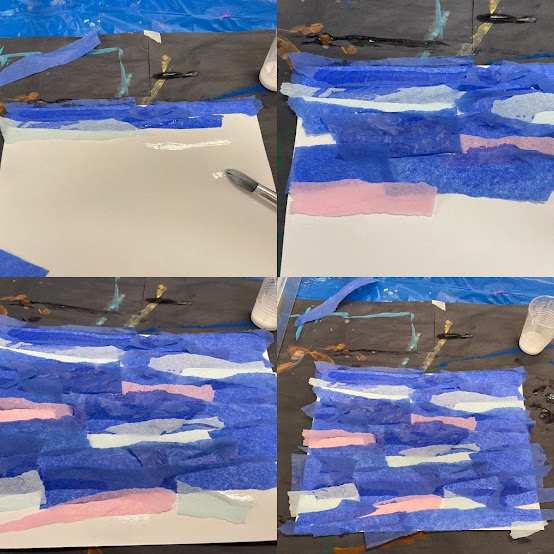
As we complete our water you may notice some tissue paper hanging off of your paper- that is okay and will create that movement and texture that we want!
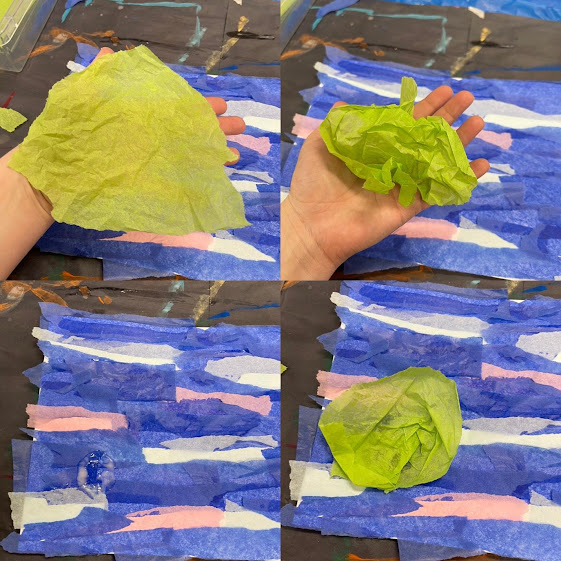
Next step is water lilies! First we will need to make the lily pad. We will take the piece of the green tissue paper and give that a scrunch! Un fold your green tissue paper and take a look. Shape and form your lily pad to how you’d like. You may want to tear a little off of a corner to make it more rounded or leave it as is!
Remember we are not worried about it looking exact and perfect, it is more about the feel!
Let’s attach our lily pad by dipping our paintbrush into our glue solution and placing a dot where we’d like our first lily pad to go. Then place your lily pad.
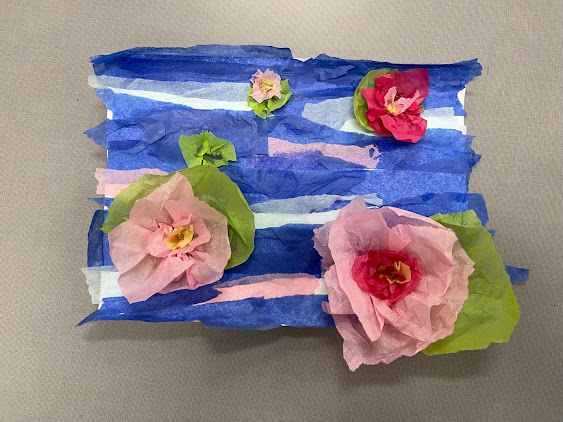
Should look something like this:
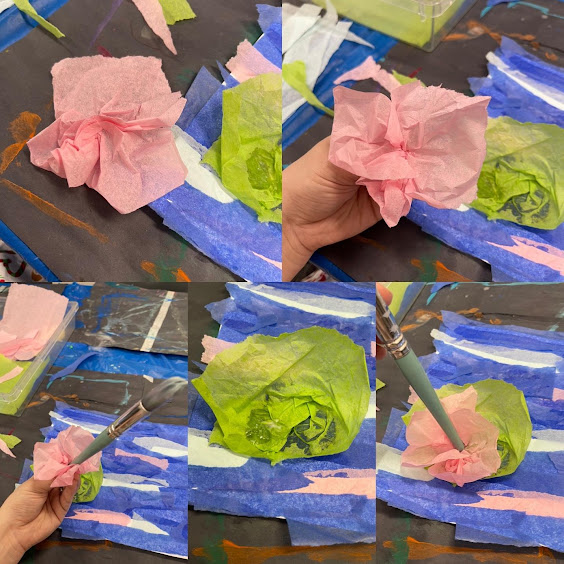
Next we will create our water lilies by taking pink tissue paper and giving it a scrunch for added texture. Then we will pinch in the middle of the tissue paper to create the center of our flower.
Go ahead and grab your paint brush and add a glue dot to the lily pad where you’d like your flower to go. You can either use your fingers and place it on the glue dot or use the end of your paint brush to keep the petals off the paper and secure only the middle of your flower.
Like this:
Next we will create more interest by adding more layers to your water lilly! Using the same process, we added more pink, and then some yellow for the center to pull it all together!
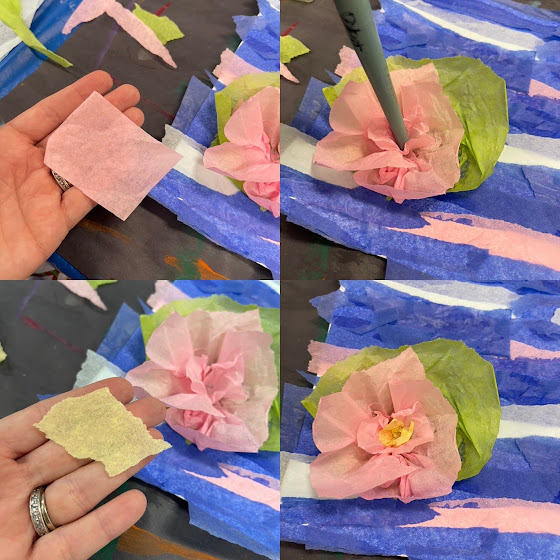
Adding more lilly pads and waterlilies to your piece will keep your eye moving and create visual interest in your artwork!

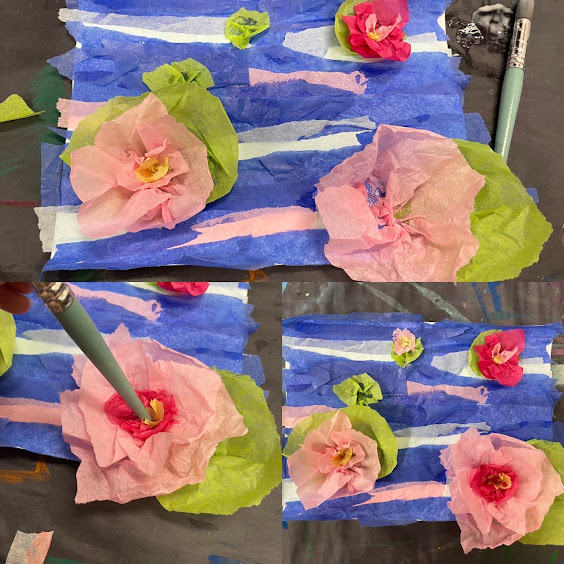
Using various sizes of lily pads and water lilies will create depth and make for the perfect masterpiece, no two alike! Have fun and remember it’s not about being exact, it’s about the feel!
Enjoy!!